Showing posts with label GNU. Show all posts

Play Terminal Velocity 3D Games Linux

4:24 AM Add Comment
Play Terminal Velocity 3D Games Linux
Terminal Velocity Game title logo dosbox Debian Linux
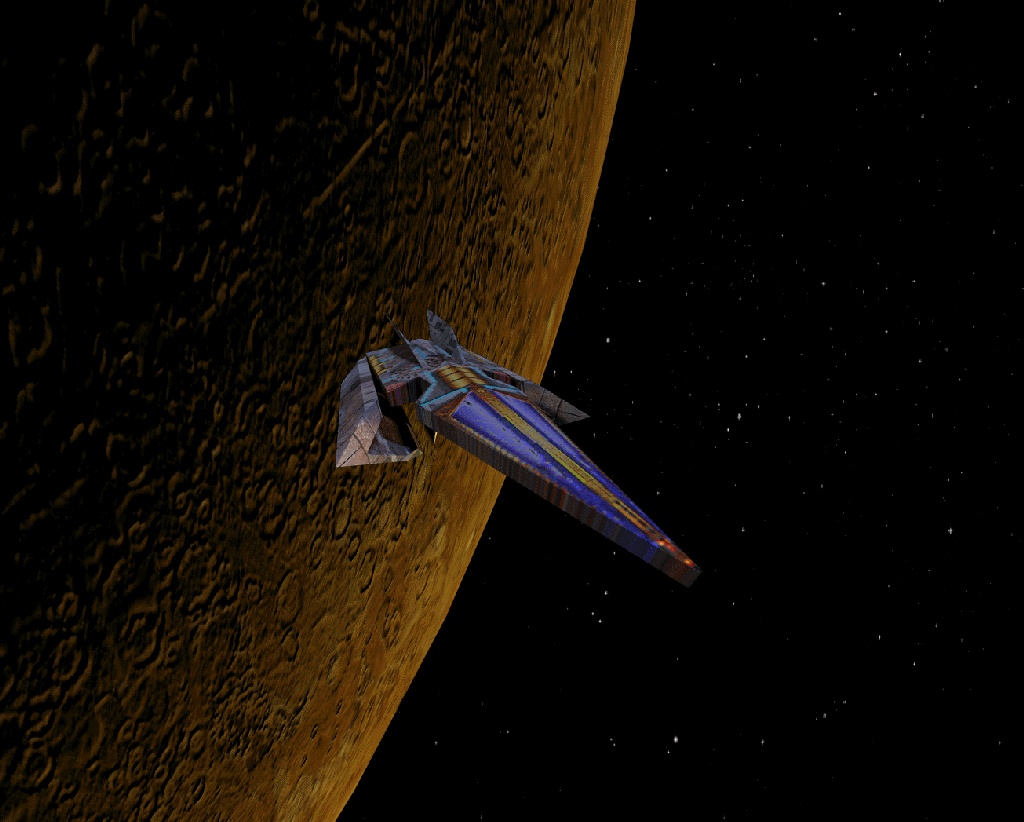
Some of the computer DOS geeks certainly should remember Terminal Velocity / (Terminal Reality Inc. – TRI) DOS 3D Realms (ex Apogee company) game. For those who are younger or for any reason miss to play TV here is a short review. Terminal Velocity is an addictive fast pace 3D Flight Simulator game.
The ship one navigates has a mean to accelerate or down-accelerate flying speed. There is also an AFTER BURNER mode which accelerates the ship movement speed drastically while in use. TRI's AFTER BURNER game feature create unique feeling whilst in game, raising gamers adrenaline and giving feeling of great dynamics ;)
The game graphics are a bit low, the game can be switched between VGA and SVGA from within the internal game menus, anyways for the year 1995 the game graphics looks fine.
Terminal Velocity TV DOS game screenshot
TV supports network games of up to 8 Network Players and for 1995 is among the few 3D games supporting so high number of network players simultaneously. As most of the games of its time TRI supports modem network game play. I don't know about you, but for me Modem Network game DooM peered plays brings up some nice memories :)
Every now and then in the levels, there are holes (Tunnels) you can enter, the tunnels is one of the most exciting part of the game as it reminds me tracking mods music culture, Future Crew's Second Reality graphics demo and the rest of the old glorious Assembly Demos – if not familiar with the aforementioned be sure to check the link cause you've missed a lot!
The ability to enter Tunnels while in the midst of the game makes TV unique and sets it apart from the rest of the games which were bombarding the 3D game flight simulator market in '95s.
Terminal Velocity DOS Level Tunnels screenshot
Terminal Velocity MINIMUM HARDWARE REQUIREMENTS are:
486 with 8 megs of memory.
For SVGA graphics (provided only by registered game version) require 486 DX4/100 or Pentium to display at acceptable frame rate.

Terminal Veolocity on Disk technical support manual
This requirements are nothing and even looks funny while compared to today's available hardware. Nowdays an Android ver. 2.2 OS running (PriVileg) mobile "smart" phone runs at at least 400 Mhz CPU and has a giga of memory.
Its quite interesting to see (from historic point of view) how thoroughful the TV Help manual is, and how well organized software documentation used to be in these old DOS days. If you want to take a look at it launch TVHELP.EXE (you will notice it along with other game .EXE files after extracting)
The game soundtrack is amazingly cool and is one of the main things that add to the great gaming experience.
It took me a while to find Terminal Velocity, as the game download link provided on 3drealms.com/downloads is broken and most of the websites with mirror of 3dtv12.zip file was no longer active.
After about half an hour of search!, I've finally found and managed to download 3dtv12.zip.
In order to preserve Terminal Violocity game from disappearing I've made a mirror of 3dtv12.zip you can download from here
Thanks to dosbox DOS Emulator , is playable on both GNU / Linux, FreeBSD, Mac OS and Windows.
I did not have the time to check if the game runs fine on other operating system architectures besides mine – a Debian GNU / Linux codename (Squeeze). On my aptop Thinkpad R61 with hardware configuration (Dual core x 1.8 Ghz with 2 GB of Memory), the game runs smoothly with both good playable graphics frame rate and properly timed sound/music.
For all those who want to play the game in the Linux realm, you will have to have earlier installed dosbox dos emulator. Once dosbox is there you can further proceed download / unzip / run and enjoy Terminal Velocity on your Linux Desktop:
1. Download and unzip 3dtv12.zip
hipo@linux:~$ mkdir TV
hipo@linux:~$ cd TV
hipo@linux:~/TV$ wget http://www.pc-freak.net/files/3dtv12.zip
hipo@linux:~/TV$ unzip 3dtv12.zip
Archive: 3dtv12.zip
� � ������ � � ����� ������ � ������ �����
� � � � � � � � � � �
�� �� �� �� ����� �� �� � �� �� � �� �
�� �� �� � �� � �� �� � �� �� � ��
������ �� ������ �� � �� �� � �� �� � �����

Running VADV 2.10 ���� ���� ������
� � � � � VirtualNet 1801001
4 Telnet nodes ����� ����� ������ FidoNet 1:311/2
VADV-PHP Website �� � �� � �� BattleNet 169:1/120
����� ����� �����

Telnet/web: lightningbbs.com
Alt: lightning-bbs.darktech.org

Full access on the first call. Simple, short and to the point newuser
questionaire. Over 50 door games online, all of them are registered.

Fun RPG games like LORD, Usurper, TEOS, Trade Wars, Clans, and Quest for Nora.

Strategic war games like BRE, FE, Global Wars, ISA, and Colonies.

Adult door games like Strip Poker, Bordello, Studs and Studette.
...

After unzip is complete you will have the following list of files and directories:
hipo@linux:~/TV$ ls -1
FILE_ID.DIZ
INSTALL.EXE
LICENSE.TXT
TV/
TV12S.SHR

As you can read in the unzip notice the .zip file was taken from Telnet/web: lightningbbs.com
I was happy to find out that lightningbbs.com BBS is still up and running in both web and telnet mode! I took the time to telnet to lightningbbs.com and it was charming. lightningbbs.com is a real place of "living computer history"! For people who have never experienced the days of BBS use, I warmly recommend you do telnet lightningbbs.com and check it out. Issue in console/terminal:
hipo@linux:~/TV$ telnet lightningbbs.com
��VADV32 v4.4.110325 - (c) 2004-2011 Aspect Technologies - www.vadvbbs.com
o NetFoss - Revision 5 FOSSIL - Com Eng v1.03 - (c) 2001-2010 pcmicro.com
Connected @ 11520 to Lightning BBS on line 3
Virtual Advanced 2.10 for DOS
Multi-User Multi-Network Graphical Bulletin Board System
Serial #99608791
...
...

2. Run and enjoy Terminal Velocity ;)
The game itself is extracted automatically in TV sub directory. To launch it directly enter TV/ and run GAME.EXE , e.g.
hipo@linux:~/TV$ cd TV/
hipo@linux:~/TV/TV$ dosbox GAME.EXE

Terminal Velocity Screenshot Debian GNU / Linux 6.0 Squeeze Dosbox dos emulator
Terminal Velocity game screenshot dosbox GNU / Linux
Running the game through the game launcher TV.EXE or GAME.EXE worked but the game sound was missing music and sound FX :|
The no-music and sound issues were however pretty normal and expected. Back in the DOS era setting your exact Sound Card device type was required before the first game launch.
Configuring the exact screen resolution (EGA / VGA / SVGA) and Sound Blaster or PC Speaker type (Sound Blaster 16 / Sound Blaster Pro) in TV is done through running SETUP.EXE .
3D Realms Terminal Velocity Screenshot Level 5 Debian Linux Squeeze dosbox
Actually SETUP.EXE used to be like a standard for almost all DOS games I've encountered.
To make Terminal Velocity sound work I had to choose from SETUP.EXE main menu:
Sound Setup -> Sound Blaster 16
or
Sound Setup -> Sound Blaster Pro

Choosing any of the two SBs produces the same sound / music effects. I guess this is the case becase dosbox emulates a number of sound cards compatible with soudn blaster.
After choosing the SB you should select Save and Launch TV to run the game with sound.
Terminal Velocity TV, dosbox setup.exe sound blaster setup program screenshot
If you quit the game and try to relaunch it with dosbox GAME.EXE unfortunately runs the game without sound fx and music again. Hence the only way to make TRI run properly with music is to everytime configure sound blaster type with SETUP.EXE . TV also supports joystick and it was nice my Genius JoyPad worked like a charm with TV under dosbox emu ;)
To play the game in full screen mode with dosbox press ALT + ENTER simultaneously.
An interesting fact which is not related to the game is Terminal Velocity is a physics term, here is a quite from Wikipedia:
"In fluid dynamics an object is moving at its terminal velocity if its speed is constant due to the restraining force exerted by the fluid through which it is moving."
On 3drealms.com, I've found also a collection of Terminal velocity mod musictvmods.zip. For the sake of preservation tvmods.zip from disappearance I've made a mirror of tvmods.zip on here

TV has also 20 cheat code words which can be typed in while playing the game for various goodies like Invisinbility, Shield Restore, Power up all weapons, skip level etc. Complete list of Terminal Velocity cheat codes is here
If you're an absolute TV addict and you want to set a TV screenshot on background Check the TV Planet 1024×768 Background resolution
TV has also a game editor, could be valuable if you want to make yourself some custom game levels here is a mirror you can download tvcad10.zip.
I've made also a quick research if someone in the Open Source / Free Software realm is not busy working on a fork of TV, but as of time of writting it seems there is no effort to make an "open source" Terminal Veolocity game. As TV is starting to disappear from the scene and 3DRealms are not existing for so many years now, it would be nice/wise if the company publish some of their prior games source. If they don't, so many great games (like TV)'s source code will be probably lost in max 10 / 15 years time.
We know 3DRealms release some of their source code for Duke Nukem 3D, I think it is now time to release source of TRI and the other old forgotten games.

by ; pc-freak.net

How to enable Automatic login in GNOME GDM 2 on GNU / Linux

7:47 AM Add Comment
How to enable Automatic login in GNOME GDM 2 on GNU / Linux
I needed to enable automatic passwordless login in my Debian GNU/Linux 
GNOME and GDM desktop environments developed a lot through the last few years, achieving these simple task was doable only through gdm manual configurations. Nowdays creatiion of user to login without any password is easy via easy to use GUI program.
In this article I'll explain, few ways to enable automatic login in GNOMEThe quickest way is to navigate in GNOMEs gnome-control-center -> Login Window submenu
To do so launch gnome-control-center – press (ALT+F2) keys and type in gnome-control-center, or launch via command line in gnome-terminal or xterm:
hipo@debian:~$ gnome-control-center
While inside the control center find en launch the Login Window as in the screenshot below:
Login Window configuration can be also done directly by launching gdmsetup from command line e.g.:
hipo@debian:~$ /usr/sbin/gdmsetup
...
gdmsetup will further pop up a window asking to type in the root password to allow you to customize, how gdm will deal with user logins.
GNOME control center login Window Debian GNU/ Linux
For who might not know gnome well architecture, gdmsetup is part of the gdm (Gnome Display Manager) package and is the default login program used to login the end user in most of the modern Linux based distributions as well as BSDs. gdm logins the users on many of the free software OS desktop environments like GNOME, LXDE, XFCE… Just to name a few of the many Linuces counting on GDM to handle the user logins: Ubuntu, Xubuntu, Fedora, Debian, Linux Mint, OpenSUSE etc.
Once the Login Windows Prefences appears go to the Security tab.
As you can see in the screenshot, what you can do with gdmsetup it is pretty self-explanatory:
enable GNOME automatic login using gdm, gdmsetup screenshot
The two options of interests for user authorization without pass are:
a. Enable Automatic Login
To enable:- put a tick on Enable Automatic Login
- from user dropdown menu, choose the user which has to be configured
b. Enable Timed Login
Enable Automatic Login lets the user login without any user password input, immediately after the configured username is typed in (if gdm is with type username prompt).
In case where the usernames are represented by Avatars, (like its in most user friendly Linux distributions), once clicked avatar the user is logged in.
When Enable Timed Login is ticked and a username is choosen or typed, instead of immediately logging the user on click or username input, the user logging is delayed with a number of set seconds .
Enabling the Automatic and / or Timed Login is doable also using few simple configurations directives in /etc/gdm/custom.conf. In many distros /etc/gdm/custom.conf will be not existing and hence the file has to be created.
To enable delayed autologin without password for a user using gdm config:
Create the file with a text editor ( vim, joe, nano )whatever your favourity and place inside:
[daemon]
TimedLoginEnable=true
TimedLogin=hipo
TimedLoginDelay=30
The above gdm config vars can also be placed inside /etc/gdm/gdm.conf but for the sake of clarity its better if custom.conf is used.
If you don't want to bother with a text editor copy paste inside any terminal lets say mlterm :
echo '[daemon]' >> /etc/gdm/custom.conf
echo 'TimedLoginEnable=true' >> /etc/gdm/custom.conf
echo 'TimedLogin=hipo' >> /etc/gdm/custom.conf
echo 'TimedLoginDelay=30' >> /etc/gdm/custom.conf
To enable auto-login for a user on a first PC boot in /etc/gdm/custom.conf put:
[daemon]
AutomaticLoginEnable=true
AutomaticLogin=hipo
An auto login can also be done by using the TimedLoginDelay gdm config directive by putting insetad of the previous code a code like:
[daemon]
TimedLoginEnable=true
TimedLogin=hipo
TimedLoginDelay=0
Where hipo is my desired username that will autolog, and as you see the LoginDelay is 0 (e.g. no gdm login delay)
I attempted to also allow autologin for several users with some cinfigurations like:
[daemon]
AutomaticLoginEnable=true
AutomaticLogin=hipo
AutomaticLogin=other-username
as well as configurations like:
[daemon]
TimedLoginEnable=true
TimedLogin=hipo
TimedLogin=other-username
TimedLoginDelay=0
In gdm3, the location of GDM config files should be /etc/gdm3/ directory, anyways the configurations directives should be working just like in gdm2
After any configuration changes to gdm.conf or custom.conf to load the new settings in gdm a gdm daemon restart is necessery with cmd:
root@debian:~# /etc/init.d/gdm restart
...
Note that, weirdly not using the gdm init script and trying to kill -HUP $(pidof gdm) / killall -9 gdm will not make gdm to load its new configurations. So always restart via/etc/init.d/gdm restart after gdm conf change.
Another alternative method to achieve login without a password input is by creating a passwordless user account on the system. This method is not recommended though, especially for machines with real IP addresses visible from the Internet (with lets say enabled) SSHD access.
Using a passwordless system account can expose the system to a severe security risk!!! Anyways, for systems not running telnet/sshd or any other system remote access service creating a user without an empty password might be not such a bad idea.
To make a user auto login without any password input /etc/shadow file (storing all user account information) needs an edit.
This is an example user entry taken from /etc/shadow:
test:$6$OPdvXArZ$ktujC6bBh9JNaCz8E9v61yNeWcJHqQiuNk8eBzevcwcIl8KFvQzJ6aBCvVpIs0Lf5MAbHjjqftUeN9crWUfxs.:15275:0:99999:7:::Now to make the test user login directly without any pass input, one can just remove his encrypted password string. After the change the user line in /etc/shadow, should be:
test::15275:0:99999:7:::
If the user is created just from scratch e.g. (a new user) that needs to login passwordless in GDM, create it without password:
root@debian:~# adduser -d newusername
To sum it up the good thing about the remove password hash method to auto login a user is that it will allow user or users login across all Display Managers (not only GDM specific).
The bad side is it is very insecure and therefore in most times a really bad practice.
I guess the described ways to login without password in Gdm on FreeBSD should similar, unfortunately right now I have not access to BSD running desktop to test it. If someone has tested it and can confirm it works it will be great to drop a comment.

How to restore accidently removed Gnome volume control in GNOME in GNU / Linux

PDF Tool for Linux

5:29 PM Add Comment

Portable Document Format (PDF) is afile format created by Adobe Systems in 1993 for document exchange. The formatincludes a subset of the PostScript page description programming language, afont-embedding system, and a structural storage system.
There is a large range ofPDF-related software available with many different applications available thatcan both output to and open files. Many open source software save documents tothis format such as OpenOffice.organd GIMP.
This article identifies the bestfree Linux PDF related software that is available. It covers software thatcreates, views, manipulates PDFs as well as selecting some useful utilities.All of the applications featured here are released under a freely distributablelicense, with the exception of Adobe Reader (which is closed source), but thisapplication is too important to ignore. Hopefully, there will be something ofinterest for anyone who wants to manage PDF documents.
Now, let's explore the 11 PDF toolsat hand. For each title we have compiled its own portal page, providing ascreenshot of the software in action, a full description with an in-depthanalysis of its features, together with links to relevant resources andreviews.
inspirations article : PDFTools
PDFedit
Editor for manipulating PDF documents
Scribus
Desktop page layout software which produces commercial grade PDF output
Inkscape
Vector-based drawing program
Ghostscript
Ghostscript PostScript / PDF interpreter
Evince
Multi-page document viewer
Adobe Reader
View, print and collaborate on PDF files
okular
Universal document viewer with support for advanced document features
Final Page
Document post production tool
pdftk
Useful tool for manipulating PDFs
QPDF
Tools for and transforming and inspecting PDF files
Xournal
Add annotations to PDF files

Menjalankan Program windows di Linux?

6:42 AM Add Comment
Bagaimana Menjalankan Program windows di Linux?


dengan Wine kita bisa jalankan program windows di linux, bagi para penggguna windows di Indonesia, yang belum sepenuhnya mau meninggal kan windows untuk keperluan sehari-hari baik rumahan atau kantoran bisa memanfaatkan software ini. software ini sudah tersedia dalam paket atau distro linux seperti ubuntu, sabily, edubuntu, centos, opensuse dan banyak lagi distro linux lainya.  kalo distro linux yang anda gunakan belum ada anda tinggal install aja kalo di ubuntu anda bisa menggunakan SYNAPTIC tinggal centang dan install aja. memang tidak semua program windows bisa di jalankan dengan wine akan tetapi wine juga selalu update akan perkembangan windows dan setiap saat wine memperbarui programnya sekarang sudah banyak aplikasi windows yang bisa berjalan di dengan wine di linux,sebutsaja office, photoshop, corel, dan lain-lain. 

sekarang aplikasi yang dulunya hanya bisa di jalankan di windows sekarang sudah banyak yang membuat dengan versi linux dan opensource. cara install program windows dengan wine sama dengan anda menginstall program pada windows
link pemilik wine

www.winehq.org
selamat mencoba

Cara Install Program di Ubuntu-Synaptic

7:00 PM Add Comment


Bagaimana menginstall program pada linux?? orang awam atau pemula pasti akan bertanya seperti itu padahal dalam linux, hampir semua turunannya. semua distro menyediakan aplikasi untuk menginstall program menghapus program atau uninstall dan mengupdate program. pada era sekarang penggunaan aplikasi ini sangat mudah dan hampir semua program yang ada di windows sekarang telah tersedia dalam bentuk open source, dan suport dengan linux.
Pada Tulisan Kali ini   saya akan menjelaskan cara mengintall program pada ubuntu dan turunanya kebetulan saya menggunakan turunan ubuntu "sabily" (ubuntu versi moslem edition). cara mengintall dan menghapus program pada ubuntu dengan Synaptic Package Manager, 
synaptic-installer-linux
Sarat pertama menggunakan aplikasi ini komputer atau laptop anda harus terkoneksi dengan internet, semua versi ubuntu dan turunanya sebagian besar sudah memasukan Synaptic Package Manager dalam operating system. setelah terkoneksi dengan internet anda tinggal masuk pada System - Administration- Synaptic Package Manager - anda tinggal cari program yang ingin anda install dengan memanfaatkan search, contoh anda ingin menginstall program Inkscape ( sebuah program grafis) anda mark atau centang pada program yang ingin di install setelah itu aply dan tunggu sampai proses selesai
Selamat mencoba prend!!!!!

Translator